How to achieve a Glass-Like Finish with Clear Cast 50: Pro Tips and Tricks
Achieving a flawless, glass-like finish with casting resins can be a game-changer, whether working on art projects, jewellery making, or even functional items. Clear Cast 50 is a resin that creates a stunning, crystal-clear finish when applied correctly. The perfect glass-like surface not only enhances the appearance of your project but also ensures durability and smoothness that lasts for years.
Achieving this clarity and smoothness is not always as simple as pouring the resin and waiting for it to set. It requires patience, proper technique, and key tricks to avoid imperfections like bubbles, streaks, and uneven surfaces. Let us explore everything you need to know to get the best Clear Cast 50 resin results. From preparation to curing and tips on how to avoid common mistakes, we’ll cover all the crucial steps. Whether you’re a beginner or an experienced crafter, these tips will help you achieve that beautiful, glass-like finish every time.
What is Clear Cast 50 Resin?
CLEAR CAST 50 is a high quality epoxy resin that has a low viscosity allowing for fast air bubble release. It drys water clear and can be cast to a depth of 50mm in a single pour. It will not shrink or crack and can easily have colours or decorative aggregates added to achieve stunning results. is a high-quality epoxy resin popular among artists, crafters, and professionals for its crystal-clear finish. This two-part resin is designed for decorative and functional applications, making it ideal for various projects, from resin art to tabletop coatings. Its unique properties allow it to cure to a glossy, glass-like finish, providing a smooth, durable surface that can withstand everyday wear and tear.
The resin’s self-levelling nature ensures that it spreads evenly across the surface once poured, helping to eliminate imperfections. Clear Cast 50 is known for resisting yellowing, making it an excellent choice for projects that need to maintain clarity over time. You can create professionally finished pieces with an ultra-smooth surface that rivals glass with the proper techniques.
Preparing Your Workspace for Success
Before working with Clear Cast 50, proper preparation is essential to achieving that flawless, glass-like finish. Here’s what you need to do:
1. Choose the Right Environment
Like most resins, Clear Cast 50 requires a controlled environment to achieve the best results. It’s essential to work in a well-ventilated space, ideally between 70°F and 80°F (21°C to 27°C). Temperatures that are too high or too low can affect the curing process, leading to imperfections such as bubbles or sticky surfaces.
Avoid working in humid environments. Excess moisture in the air can cause the resin to cure unevenly, potentially ruining your project. Consider using a dehumidifier if you’re working in an area with high humidity.
2. Gather the Right Tools
To get that perfect finish, you’ll need a few essential tools:
- Measuring cups: Accurate measurements of resin and hardener are crucial for proper curing.
- Stir sticks: Make sure you have disposable stir sticks to mix the resin and hardener.
- Mixing containers: Use clean containers for mixing, as any leftover residue can cause uneven curing.
3. Prepare Your Mould or Surface
If you’re using a mould, ensure it’s clean and free of any debris that might interfere with the curing process. For flat surfaces like tables or countertops, ensure the area is level. Even slight inclines can cause the resin to pool unevenly, affecting the glass-like finish you’re aiming for.
Mixing Clear Cast 50 Resin
One of the most critical steps in achieving a glass-like finish with Clear Cast 50 is ensuring that the resin and hardener are mixed thoroughly. Here’s a step-by-step guide to perfecting your mixing process:
- Accurate Measurements
Clear Cast 50 requires an exact 1:1 ratio of resin to hardener. Using the wrong proportions can result in incomplete curing, sticky surfaces, or cloudy finishes. Measure each component carefully, using separate containers for the resin and hardener, then pour them into a mixing container.
- Thorough Stirring
Once the resin and hardener are in the same container, stir slowly. Stir for about 3 to 5 minutes, scraping the sides and bottom of the container to ensure everything is well incorporated. It’s important to stir slowly to avoid creating air bubbles, which can ruin the smooth, glass-like finish.
- Avoid Over Mixing
While thorough mixing is essential, avoid stirring too aggressively. Over-mixing can introduce bubbles into the resin, which may appear imperfections in your finished product. Stir at a steady pace, and make sure no streaks remain in the mixture.
Pouring the Resin
In the pouring stage, many people make mistakes that result in imperfections in the finished product. Here are the essential tips for pouring Clear Cast 50 to achieve the best glass-like results:
- Pour Slowly and Steadily
When you’re ready to pour, do so slowly and steadily. Avoid splashing or pouring the resin too quickly, as this can cause bubbles. Pour the resin onto the centre of your mould or surface, and let it flow outwards. This helps to minimize the risk of air pockets.
- Control the Pouring Height
Keep the pouring height to a minimum to avoid splashing. Pouring from a low height helps ensure the resin flows smoothly, reducing the chance of bubbles forming.
- Watch for Bubbles
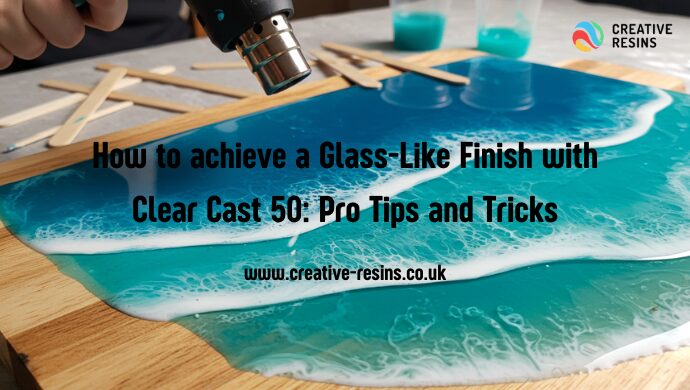
Bubbles are one of the most common issues when working with resin, but they can be easily fixed. After pouring, use a heat gun or torch to pass over the surface of the resin. The heat will cause the bubbles to rise to the surface and pop, leaving a smooth, clear surface behind.
Dealing with Bubbles and Imperfections
No matter how careful you are, bubbles may still appear during the pouring process. Here’s how to handle them:
- Use a Heat Gun or Torch
Once your resin is poured, gently pass over the surface with a heat gun or a small torch. Hold the heat source about 6 to 8 inches from the resin to avoid disturbing it. The heat will cause any trapped air bubbles to rise to the surface and burst, leaving you with a crystal-clear finish.
- Work in Layers
If your project involves pouring thick resin layers, it is often best to do so in multiple stages. Pouring in layers reduces the risk of bubbles forming deep within the resin and ensures that each layer cures appropriately before adding the next.
Curing Time and Handling the Resin
After you’ve poured the resin, it’s essential to give it time to cure correctly. The curing time for Clear Cast 50 typically takes 24 to 48 hours, depending on the thickness of the pour and the room’s temperature. It’s crucial to avoid touching or disturbing the resin during this time to prevent fingerprints or other imperfections.
- Let it set
Once your resin is poured, allow it to set undisturbed for at least 24 hours. The resin will begin to cure and solidify, achieving that beautiful glass-like finish. If you’re working on a larger project, you may need to wait longer for the resin to set fully.
- Sanding and Polishing (If Needed)
In some cases, after the resin has fully cured, you may need to sand and polish the surface to remove any minor imperfections. Start with a fine-grit sandpaper and gradually move to a higher grit for a smooth, polished surface. After sanding, use a polishing compound to restore the glass-like finish.
Common Mistakes to Avoid
To ensure you achieve a glass-like finish with Clear Cast 50, here are some common mistakes to avoid:
- Incorrect measurements: Not using the exact 1:1 ratio can lead to incomplete curing.
- Mixing too quickly: Stirring too fast can create air bubbles, which ruin the finish.
- Not using a level surface: A slight incline can cause the resin to pool unevenly.
- Premature handling: Touching the resin before it is cured can leave marks or fingerprints.
Conclusion
Achieving a glass-like finish with Clear Cast 50 resin is entirely possible with the proper techniques and a bit of patience. You can create stunning pieces with a clear, smooth surface by ensuring proper preparation, mixing, pouring, and curing. Whether you’re creating jewellery, artwork, or functional items, these pro tips will help you avoid common mistakes and achieve the flawless results you’re aiming for.
If you’re ready to start with Clear Cast 50, want to learn more about the resin, or need assistance with your next project, request a quote today. Our experts are here to guide you through the process and ensure you achieve that perfect finish every time!
We at Creative Resins offer superior clear-cast resins at the best prices. Call us now! – 01795 411820


