 ASSETS_(Mar 21)")
Category: Uncategorized
Citizenship-Based Taxation: The Unique Burden on U.S. Expatriates
The United States stands alone among developed nations in implementing citizenship-based taxation (CBT). This system requires U.S. citizens to report and pay taxes on worldwide income, regardless of where they reside. This unique approach has profound implications for the estimated 9 million U.S. citizens living abroad, who often navigate a complex and burdensome tax landscape. While proponents argue that citizenship taxation ensures tax equity and helps prevent tax evasion, many expatriates experience significant financial and emotional stress due to these obligations. For U.S. citizens living overseas, the challenges of citizenship tax can be daunting. They must comply with U.S. tax laws while also adhering to the tax regulations of their host countries, leading to potential double taxation. The emotional toll of feeling disconnected from the U.S. government while still subject to its tax laws can create disenfranchisement. Let us explore the intricacies of citizen-based taxation, examine its impacts on expatriates, and discuss the ongoing debates surrounding this contentious issue, shedding light on the unique struggles faced by U.S. citizens living abroad.
Understanding Citizenship-Based Taxation
Citizenship-based taxation starkly contrasts the more common residence-based taxation system most countries adopt. Under CBT, U.S. citizens must report and pay taxes on worldwide income to the Internal Revenue Service (IRS), even if they have been living and working abroad for years or decades. The roots of citizenship taxation in the U.S. tax system can be traced back to the Civil War era when the government sought to ensure that all citizens contributed their fair share to the nation’s coffers. Over time, this principle has been reinforced through various legislative acts, such as the Foreign Account Tax Compliance Act (FATCA) of 2010, which aims to prevent tax evasion by requiring foreign financial institutions to report on accounts held by U.S. taxpayers.
Impacts of Citizenship-Based Taxation
The financial implications of citizen taxes for U.S. expatriates are significant. In addition to their tax obligations to their country of residence, they must also navigate the complex web of U.S. tax laws and regulations. This often requires hiring specialized Tax Professionals, adding to the already substantial financial burden. Citizenship-based taxation can have emotional and psychological effects on expatriates. Many feel a sense of disenfranchisement, as they are required to pay taxes to a government from which they feel disconnected. The burden of compliance and the potential penalties for non-compliance can be overwhelming, leading to stress and anxiety.
The Expat Experience
As per the Association of Americans Resident Overseas (AARO), approximately 9 million U.S. citizens live abroad, with the majority residing in Canada, Mexico, the United Kingdom, Germany, and France. These expatriates face a unique set of challenges regarding tax filing and compliance.
- One of the most common issues is the complexity of tax treaties and foreign income exclusions.
- While the U.S. has tax treaties with many countries, the interplay between these treaties and citizenship taxation can be confusing and often leads to double taxation.
- The Foreign Earned Income Exclusion (FEIE) allows expatriates to exclude a portion of their foreign-earned income from U.S. taxes. It has strict eligibility requirements and limitations.
- The implementation of FATCA has also had a significant impact on expatriates. By needing foreign financial institutions to report on accounts held by U.S. taxpayers, FATCA has made it more difficult for expatriates to maintain bank accounts and access financial services in their countries of residence.
- Many foreign banks have opted to close the accounts of U.S. citizens altogether rather than comply with the reporting requirements.
Arguments For and Against Citizenship-Based Taxation
- Proponents of citizenship-based taxation argue that it ensures tax equity and prevents tax evasion.
- By requiring all U.S. citizens to report and pay taxes on their worldwide income, the government can verify everyone contributes their fair share.
- Citizen-based taxation makes it more difficult for individuals to hide assets or income abroad, reducing the potential for tax evasion.
- Critics of citizenship taxation, however, argue that it is an unfair and outdated system that burdens expatriates. They point out that most other developed nations have shifted to a residence-based taxation system, which taxes individuals based on where they live and work.
- Critics also argue that citizen taxes are a form of double taxation, as expatriates must pay taxes in both their residential country and the U.S.
- There have been calls to repeal or reform citizenship-based taxation, with some advocating a shift to a residence-based taxation system.
Expatriate advocacy groups, such as American Citizens Abroad (ACA) and the Association of Americans Resident Overseas (AARO), have been actively pushing for change, lobbying the IRS to address the challenges expatriates face under CBT.
Recent Developments and Future Considerations
In recent years, some legislative proposals have addressed the challenges of citizenship tax.
- In 2021, the Tax Fairness for Americans Abroad Act was introduced in the U.S. House of Representatives. This act would allow U.S. citizens living abroad to elect to be taxed based on their country of residence rather than their citizenship.
- The IRS has tried to streamline the tax filing process for expatriates, introducing initiatives like the Streamlined Filing Compliance Procedures and the Taxpayer Advocate Service.
- Many expatriates still find the process complex and time-consuming, arguing that more must be done to address their unique challenges.
As the debate over citizenship-based taxation continues, it’s clear that the issue will remain a significant concern for U.S. expatriates in the years to come. The outcome of ongoing discussions on taxation policies will have far-reaching implications for U.S. citizens living abroad and will shape the future of the U.S. tax system.
Conclusion
Citizenship-based taxation is a complex and contentious issue with significant implications for U.S. expatriates. While the rationale behind citizenship taxation is to ensure tax equity and prevent evasion, it has created a substantial burden for those living abroad, both financially and emotionally. As the debate over citizen-based taxation continues, expatriates must stay informed and engaged with their representatives in pushing for reform. By advocating for a more equitable and streamlined tax system, we can work towards a future where the unique challenges of citizenship tax do not unfairly burden U.S. citizens living abroad.
If you are a U.S. expatriate struggling with the challenges of citizenship-based taxation, know that you are not alone. Resources and support are available to help you navigate the complexities of the U.S. tax system and advocate for change.
We at KK Associates provide Tax preparation Services to handle the challenges of citizenship-based taxation at the best prices. Call us now! – +91 20 25511024, +91 9823149491
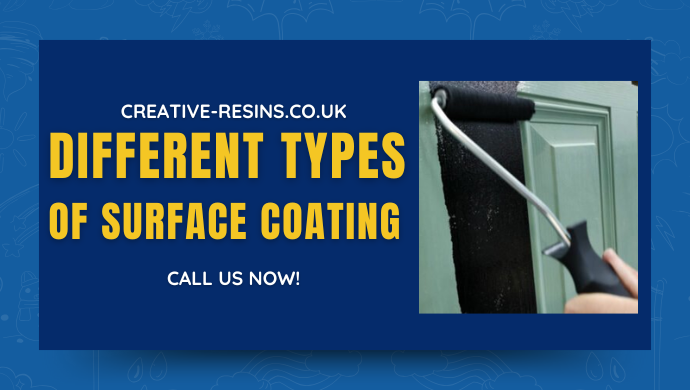
A Comprehensive Guide to Different Types of Surface Coatings Comparison
Surface coatings are crucial in improving various materials’ functionality and aesthetics across multiple industries. These coatings are essential in everyday applications, from protecting surfaces from environmental damage to providing decorative finishes. Whether you’re a homeowner looking to spruce up your living space or a professional contractor seeking the best products for a project, understanding the different types of surface coatings available is vital. Let us see five common types of surface coatings: Glass Paint, Door & Window Paint, Metal Paint, Floor Paint, and Aerosol Paint. These coatings have unique properties, applications, and advantages that cater to specific needs. Whether you’re painting furniture, refreshing your home’s exterior, or coating industrial floors, knowing which type of paint to use can significantly impact the outcome.
Let’s explore each type of surface coating in detail to help you choose the right one for your needs.
Types of Surface Coatings
Glass Paint
Glass paint is formulated explicitly on glass surfaces and is available in various colours and finishes. These paints are typically made from acrylics or enamels that adhere well to glass while providing a durable finish. One of the critical features of glass paint is its transparency; many products allow light to pass through while adding colour or design to the surface.
Applications: Glass paint is commonly used for decorative purposes on windows, glassware, and art projects. It can be used to create stained glass effects or to paint designs on vases and other decorative items. Because of its versatility and ease of use, glass paint is often utilized in craft projects.
Durability: When properly cured, glass paint can be durable and resistant to chipping and fading. Many formulations are also weather-resistant, making them suitable for outdoor applications.
Door & Window Paint
Door and window paint is designed for wooden or metal doors and frames. It comes in oil-based and water-based formulations.
Composition: Oil-based paints provide a smoother finish and better durability against the elements but may have higher VOC levels. Water-based paints are effortless to clean up and have lower VOC emissions but may require more frequent reapplication.
Durability Features: High-quality door and window paints resist weathering, UV light, and moisture. They are formulated to withstand the rigours of daily use while maintaining their appearance over time.
Applications: These paints are ideal for both interior and exterior use. They can be used on front doors, patio doors, window frames, and shutters.
Metal Paint
Metal paint protects metal surfaces from rust and corrosion and provides an attractive finish. Several types of metal paint are available, including epoxy, polyurethane, and enamel options.
Types of Metal Paints:
- Epoxy Paints: Known for their exceptional adhesion and chemical resistance, epoxy paints are ideal for industrial applications.
- Polyurethane Paints: These provide a tough finish that resists scratches and UV light.
- Enamel Paints: Often used for decorative purposes due to their glossy finish.
Corrosion Resistance: Metal paints often contain rust-inhibiting properties that help safeguard against corrosion caused by moisture and chemicals. This makes them suitable in harsh environments such as marine settings or industrial facilities.
Applications: Metal paints are commonly used on fences, machinery, vehicles, and metal structures.
Floor Paint
Floor paint is designed specifically for coating floors in residential or commercial settings. Depending on the intended use, it comes in various formulations.
Composition and Characteristics: Epoxy floor coatings are popular due to their durability, resistance to chemicals, and abrasion. They create a hard surface that can withstand heavy foot traffic.
Applications: Floor paint is used in garages, warehouses, retail spaces, and residential living areas. It can also be used outdoors on patios or walkways.
Slip Resistance: Many floor paints have added slip-resistant properties to ensure safety in high-traffic areas or environments prone to spills.
Aerosol Paint
Aerosol paint offers convenience and versatility for various DIY projects. Packaged in spray cans, aerosol paint allows easy application without brushes or rollers.
- Convenience and Versatility: Aerosol cans’ portability makes them ideal for quick touch-ups or small projects. They are also available in various colours and finishes (matte, gloss) and are suitable for crafts or automotive applications.
- Types Available: Aerosol paints can be formulated for specific surfaces such as wood, metal, plastic, or fabric. This versatility makes them popular among hobbyists and professionals alike.
Want to Know More? Check the Differences in Our Blog on Surface Coatings!
Comparison Criteria
When comparing different types of surface coatings like Glass Paint, Door & Window Paint, Metal Paint, Floor Paint, and Aerosol Paint, several criteria should be considered:
Durability and Resistance
Durability is one of the most critical factors when selecting a surface coating:
- Glass Paint: It is durable.
- Door & Window Paint: Offers excellent weather resistance; high-quality options last several years without peeling.
- Metal Paint: Highly durable with strong corrosion resistance; ideal for outdoor metal surfaces.
- Floor Paint: Extremely durable with good abrasion resistance; epoxy options last longer under heavy traffic.
- Aerosol Paint: Aerosol paint offers excellent resistance to UV rays, moisture, and abrasion, significantly enhancing the durability of the coated surface.
Application Methods
The method of application can influence the ease of use:
- Glass Paint: Typically applied with brushes or sponges; requires careful handling.
- Door & Window Paint: This can be applied with brushes or rollers; oil-based versions may require more skill.
- Metal Paint: Often sprayed on for even coverage; some may also be brushed.
- Floor Paint: Usually rolled out; some products may require two coats.
- Aerosol Paint: Sprayed directly from the can; very user-friendly but requires proper ventilation during application.
Cost Effectiveness
Cost considerations vary based on the type of coating:
- Glass Paint: Generally affordable but may require multiple coats depending on opacity.
- Door & Window Paint: Mid-range pricing; quality matters significantly regarding longevity.
- Metal Paint: Costs vary widely based on formulation; epoxy options tend to be pricier but offer long-term savings through durability.
- Floor Paint: This may have higher initial costs but saves money over time due to reduced maintenance needs.
- Aerosol Paint: Aerosol Paint is often inexpensive but may not cover as large an area as other types; it is best suited for smaller projects.
Performance Analysis
To further understand how these coatings perform under various conditions:
Adhesion Tests
Adhesion tests evaluate how well each coating bonds to its substrate:
- Glass Paint: Good adhesion when adequately cured.
- Door & Window Paint: High adhesion levels are crucial due to exposure; quality products from Creative Resins stick well.
- Metal Paint: Excellent adhesion properties; epoxy formulations bond exceptionally well.
- Floor Paint: Strong adhesion is essential.
- Aerosol Paint: When applied to properly prepared surfaces, it demonstrates strong adhesion properties.
Choosing the Right Surface Coating
Selecting the suitable surface coating involves considering specific needs:
Application-Specific Considerations
Think about where you will apply the coating:
- For indoor decorative items (like vases), glass paint works best.
- For exterior doors exposed to weather elements regularly—opt for high-quality door & window paint.
- If protecting outdoor metal structures from rusting—metal paint is essential.
- For garage floors needing durability—floor paint provides long-lasting protection.
- Choose aerosol spray paints for various surfaces for quick touch-ups around the house.
Conclusion
In summary, understanding the characteristics of different types of surface coatings—Glass Paint, Door & Window Paint, Metal Paint, Floor Paint, and Aerosol Paint—can significantly influence your project’s success. Each type has unique properties suited for specific applications ranging from decorative finishes on glass items to protective layers on metal surfaces exposed outdoors. When selecting a coating type, consider factors like durability against environmental conditions and ease of use during application processes—this will ensure long-lasting results tailored perfectly towards individual needs, whether they involve home improvement tasks or industrial applications!.
We at Creative Resins offer superior-quality Surface Coatings at the best prices. Call us now! – 01795 411820

Paint Mixing Machine: Revolutionizing the Mixing Process
The quality of paint and coatings is paramount in commercial and industrial applications. Achieving the perfect colour and texture is crucial for residential homes, commercial buildings, or specialized industrial projects. This is where paint-mixing machines come into play. These machines ensure that paints are mixed thoroughly and consistently, eliminating the risk of colour variations and ensuring a smooth application. Among the various types of paint-mixing machines available, gyroscopic paint-mixing machines stand out due to their innovative design and functionality.
Utilizing the principles of gyroscopic motion, these machines provide a unique mixing experience that enhances the quality of the final product. The gyroscopic motion allows for a more uniform distribution of materials, resulting in consistent colour and texture throughout the paint. Modern gyroscopic paint mixing machines have features that streamline the mixing process, such as an auto-unlock tray for easy removal of paint cans and robust steel frame construction for durability. Let us explore the workings of gyroscopic paint mixing machines, their features, applications, advantages, and tips for choosing and maintaining the suitable machine for your needs. Let us see how this specialized equipment can improve the efficiency and quality of your paint-mixing processes.
Understanding Gyroscopic Motion
The gyroscopic motion refers to the behaviour of a spinning object that maintains its orientation due to angular momentum. This principle is harnessed in paint mixing to create a dynamic mixing environment. When the mixing container is spun at high speeds, the gyroscopic motion causes the materials inside to move in a circular pattern, ensuring that all components are thoroughly combined. The benefits of using gyroscopic motion in paint mixing are numerous.
- It allows for a more efficient mixing process.
- Traditional mixing methods often lead to uneven distribution of pigments and additives, resulting in colour inconsistencies and texture variations. Gyroscopic mixing, on the other hand, promotes a uniform blend, minimizing the risk of batch variations.
- The motion created by gyroscopic mixing reduces the air introduced into the paint, which can lead to bubbles and imperfections in the final product. This is especially important for high-quality finishes where any imperfection can be noticeable.
Overall, gyroscopic motion enhances the mixing process, leading to superior results in paint and coatings.
Key Features of Gyroscopic Paint Mixing Machines
1. Auto-Unlock Tray
One of the standout features of gyroscopic paint mixing machines is the auto-unlock tray. This innovative design enables easy removal of paint cans from the machine, enhancing user convenience and efficiency. Traditional paint-mixing machines often require manual intervention to release the cans, which can be cumbersome and time-consuming. The auto-unlock mechanism streamlines this process, allowing operators to focus on other tasks while ensuring the paint is mixed correctly.
2. Construction
Durability is a critical factor in any industrial equipment, and gyroscopic paint-mixing machines are no exception. These machines are typically constructed from robust steel frames, providing the strength and stability needed for heavy-duty mixing applications. The steel construction ensures longevity and minimizes vibrations during operation, which may affect the quality of the mix. The design of these machines incorporates features that protect against wear and tear, such as reinforced mixing containers and high-quality bearings. This attention to construction detail contributes to the overall reliability and performance of the equipment, making it a worthwhile investment for businesses in the paint and coatings industry.
3. Precision Control
Modern gyroscopic paint mixing machines have advanced control systems, allowing operators to adjust mixing parameters precisely. Users can modify settings such as mixing speed, rotation direction, and duration to suit their requirements. This level of control is essential for getting the desired consistency and quality in the end product. For instance, different types of paint may require varying mixing speeds to achieve optimal results. By having the ability to fine-tune these parameters, operators can ensure that each batch meets the necessary standards for colour and texture. This versatility makes gyroscopic paint mixing machines suitable for various applications and materials.
Applications of Gyroscopic Paint Mixing Machines
Gyroscopic paint mixing machines are primarily used in the paint and coatings industry, where they play a crucial role in ensuring uniformity and quality. Some of the critical applications include:
Paint and Coatings
The most common application of gyroscopic paint mixing machines is in producing paints and coatings. These machines are designed to handle various paints, including water-based, oil-based, and speciality coatings. By utilizing gyroscopic motion, manufacturers can achieve consistent colour and texture, essential for customer satisfaction and product performance. In addition to traditional paint mixing, these machines can blend additives, pigments, and other materials to create custom formulations. This flexibility allows manufacturers to cater to specific customer needs, enhancing their competitive edge.
Advantages of Using Gyroscopic Paint Mixing Machines
The advantages of gyroscopic paint mixing machines extend beyond just improved mixing efficiency. Here are some key benefits:
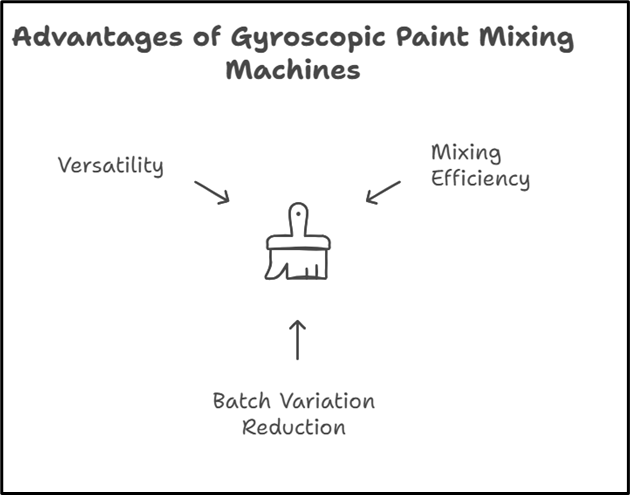
1. Enhanced Mixing Efficiency and Consistency
Gyroscopic paint mixing machines provide a mixing efficiency that is challenging with traditional methods. The unique motion ensures that all components are thoroughly combined, producing a uniform product. This consistency is critical for maintaining quality across batches, especially for businesses that rely on brand reputation.
2. Reduction in Batch Variations
One of the significant challenges in paint production is batch variations, which can lead to inconsistencies in colour and texture. Gyroscopic mixing minimizes this risk by ensuring that each batch is mixed uniformly. This reliability improves product quality and reduces waste and rework, ultimately saving time and resources.
3. Versatility in Handling Different Materials
Gyroscopic paint mixing machines are designed to handle various materials, including liquids, powders, and pastes. This versatility makes them suitable for various applications beyond just paint mixing. Manufacturers can use these machines to blend other materials, such as adhesives, sealants, and coatings, further enhancing their utility in industrial settings.
Choosing the Right Gyroscopic Paint Mixing Machine
When selecting a gyroscopic paint mixing machine, several factors should be considered to ensure that you select the right one for your needs:
Size and Capacity Requirements
Specific Features Needed for Different Applications
Manufacturer Reputation and Support Services
Evaluate the machine’s size and capacity based on your production requirements. Consider the volume of paint you typically mix and whether you need a machine that can handle larger batches. Selecting a machine that can satisfy your current needs while allowing for future growth is vital.
Different applications may require specific features in a paint-mixing machine. For instance, if you frequently work with speciality coatings or additives, look for machines that precisely control mixing parameters. Features like the auto-unlock tray should be considered for ease of use and maintenance.
Research the manufacturer’s reputation before making a purchase. Look for companies known for producing high-quality equipment and providing excellent customer support. A reliable manufacturer will offer warranties, maintenance services, and readily available replacement parts, protecting your investment.
Maintenance and Care for Longevity
Regular maintenance is vital to increase the lifespan and performance of your gyroscopic paint mixing machine. Here are some tips for keeping your machine in optimal condition:
Regular Cleaning
Inspect for Wear and Tear
Follow Manufacturer Guidelines
After each use, clean the mixing container and any other components that come into contact with the paint. Residual paint can lead to contamination and affect the quality of future batches. Use appropriate cleaning agents and follow the manufacturer’s recommendations for cleaning procedures.
Examine the machine regularly for wear and tear, particularly on moving parts such as bearings and seals. Addressing any issues promptly can prevent more significant problems and extend the machine’s lifespan.
Always adhere to the manufacturer’s maintenance guidelines and recommendations. This includes routine checks, lubrication of moving parts, and any necessary adjustments. Following these practices will ensure that your gyroscopic paint mixing machine operates at peak performance.
Conclusion
Gyroscopic paint mixing machines are a game-changer in the paint and coatings industry, improving efficiency, consistency, and versatility. By leveraging the principles of gyroscopic motion, these machines ensure that every batch of paint meets the highest quality standards, reducing the risk of variations and imperfections. As you consider investing in a gyroscopic paint mixing machine, remember the key features, applications, and maintenance tips discussed in this blog. Choosing a suitable machine can significantly improve your mixing processes, leading to better products and increased customer satisfaction. Embrace the future of paint mixing with gyroscopic technology and elevate your production capabilities.
We at Creative Resins offer supreme quality Paint Mixing Equipment at the best prices. The mixing time of our equipment is 60 seconds, and it can effortlessly mix weights up to 36 Kg. Our equipment has an auto-unlock tray, making removing the paint cans from the machine easier. It is manufactured using a steel frame construction with an overall weight of 245 kg, providing a silent operation. It is easy to operate with user-friendly controls. Call us now! – 01795 411820
Mastering Clear Cast 50: Your Go-To Resin for Stunning Creations
Choosing materials can make all the difference between a mediocre result and a stunning masterpiece in crafting and DIY projects. Among the many options available, Clear Cast 50 stands out as an exceptional clear epoxy casting resin that has garnered attention for its remarkable properties. Whether you are a seasoned artisan or a weekend hobbyist, this resin offers unparalleled clarity and versatility, making it an ideal choice for various applications.
What sets Clear Cast 50 apart is its ability to deliver a glass-like finish while maintaining durability and resistance to yellowing over time. This makes it perfect for projects where aesthetics are paramount, such as furniture making, artistic endeavours, and intricate DIY projects. With the capability to be poured up to 50mm thick in a single application, Clear Cast 50 opens up a world of possibilities for creating stunning pieces without needing multiple layers. Its machine-polishable surface also allows for a professional-grade finish to elevate any project. Let us explore the features, applications, and advantages of Clear Cast 50, providing you with all the information you need to harness its potential in your creative ventures.
What is Clear Cast 50?
Clear Cast 50 is a high-quality epoxy resin formulated for casting and coating applications. It has two components: a resin and a hardener, which, when mixed, initiate a chemical reaction that gives a solid and durable material. This two-component system is designed to provide exceptional clarity and strength, making it suitable for artistic and functional applications. The name “Clear Cast 50” reflects its unique ability to be cast in thick layers—up to 50mm—in one application without compromising transparency or integrity. This feature benefits artists and artisans who want to create deep pours or encapsulate objects within the resin. The formula is also engineered to resist yellowing over time, confirming that your creations maintain their pristine appearance even when exposed to sunlight or environmental factors.
Key Features of Clear Cast 50
Exceptional Clarity
One of the standout features of Clear Cast 50 is its remarkable clarity. The resin cures to an ultra-clear finish resembling glass, allowing colours and details beneath the surface to shine brilliantly. This transparency makes it an excellent choice for projects where visual appeal is crucial, such as jewellery-making or decorative art pieces.
Thickness Capability
Unlike many other resins that require multiple layers for thicker pours, Clear Cast 50 can be poured up to 50mm thick in one go. This saves time and reduces the risk of imperfections that can occur with multiple layers. Achieving such thickness opens up exciting possibilities for creating unique designs and structures.
Polishing Potential
Another significant advantage of Clear Cast 50 is its polishability. Once cured, the surface can be machine-polished to achieve a glass-like finish that enhances its aesthetic appeal. This feature is valuable for projects where a high-gloss finish is anticipated, allowing artisans to achieve professional results with relative ease.
Applications of Clear Cast 50
Furniture Making
Clear Cast 50 has become increasingly popular in furniture making, especially for creating stunning river tables and other unique pieces. Its ability to fill gaps and voids while maintaining clarity allows artisans to showcase natural wood grains alongside vibrant colours or embedded objects.
Artistic Uses
Artists have embraced Clear Cast 50 for various creative projects. This epoxy provides endless opportunities for artistic expression, from encapsulating flowers in resin to crafting intricate jewellery pieces. Its clarity ensures that every detail remains visible, enhancing the overall impact of the artwork.
DIY Projects
For DIY enthusiasts, Clear Cast 50 is an excellent material for home improvement projects and custom creations. Whether you’re looking to create coasters, tabletops, or decorative items, this resin’s versatility makes it suitable for various applications.
Advantages Over Other Resins
When compared to other epoxy resins on the market, Clear Cast 50 provides numerous advantages:
- Clarity: Many resins tend to yellow over time; however, Clear Cast 50 maintains its transparency even after prolonged exposure to UV light.
- Thickness: The ability to pour up to 50mm thick in one layer sets it apart from standard resins that often require multiple pours.
- Finish: The capacity for machine polishing permits users to get a high-gloss finish that rivals professionally manufactured products.
Tips for Using Clear Cast 50
To maximise your results with Clear Cast 50, consider these helpful tips:
Mixing Instructions
Proper mixing is vital to get optimal results. Follow the manufacturer’s recommended mixing ratio carefully—typically, a ratio of resin to hardener (e.g., 1:1 by volume). Mix thoroughly until you get a uniform consistency without streaks.
Pouring Techniques
To minimise bubbles during pouring, pour slowly from one corner of your mould rather than directly into the centre. This technique assists in minimising turbulence and allows air bubbles to escape more easily.
Curing Process
Temperature plays a significant part in the curing process. Ensure your workspace is at an appropriate temperature (usually between 20°C – 25°C) and avoid drafts or direct sunlight during curing. Allow sufficient time for curing before handling your project—typically around 24 hours or more, depending on thickness.
Maintenance and Care
Maintaining your Clear Cast 50 creations is essential for preserving their beauty over time:
- Cleaning: Use mild soap and water with a soft cloth for cleaning surfaces. Do not use harsh chemicals that could damage the resin.
- Protection: Consider using coasters under hot items or placing protective pads under furniture to avoid scratches.
Conclusion
Clear Cast 50 is an exceptional epoxy casting resin that combines clarity, versatility, and ease of use. Its unique properties make it suitable for various applications—from stunning furniture pieces to intricate art projects—while its ability to maintain transparency over time ensures lasting beauty. Whether you’re an experienced artisan or just starting your creative journey, Clear Cast 50 offers endless possibilities for bringing your ideas to life. You can create stunning works that impress and stand the test of time with proper techniques and care.
We at Creative Resins offer superior quality clear-casting resin at the best prices. Call us now! – 01795 411820
Clear Cast 50 Epoxy Resin with 25% Discount!
Clear epoxy casting resin is a versatile material that offers excellent clarity, UV resistance, and scratch resistance for various applications, such as river tables, deep castings, jewellery, and more. With options for fast and slow curing times and the ability to pour up to 50mm in thickness in a single pour, clear casting resins provide limitless creative possibilities for DIY enthusiasts and professionals alike.
Imagine a versatile, resilient substance that can capture the essence of your wildest dreams with unparalleled clarity and brilliance. From intricate jewellery pieces to captivating resin paintings, this remarkable epoxy resin has the power to elevate your artistic endeavours to new heights. Let us explore the magic of Clear Cast 50 Epoxy Resin and uncover its endless possibilities for crafting beauty beyond imagination.
Types of Clear Casting Resins
Clear epoxy casting resins like Clear Cast 50 come in various formulations for applications and project sizes. Here is a table summarizing the main types of clear casting resins:
| Resin Type | Characteristics |
|---|---|
| Casting resins for small castings | Thin viscosity, fast curing (within 1 day), clear, hard, and brittle. Ideal for jewellery, pens, coasters, and small decorative items. |
| Casting resins for medium castings | It has a thin viscosity, slow curing (2-3 days), is clear and hard, and can cast layers up to 5 cm. It is suitable for serving boards, small furniture, lamps, clocks, and medium-sized epoxy river tables. |
| Casting resins for large castings | Low viscosity, slow curing (3-5 days), can cast larger volumes (up to 50L) and thicker layers (10-12 cm). Used for dining tables, coffee tables, doors, headboards, and large furniture pieces. |
| Table top resin | Thin viscosity, relatively fast curing, good flow, minimal shrinkage, and good surface resistance. Creates a glass-like finish for wood and resin castings. |
In addition to these categories, specialized clear-casting resins are available for specific applications:
- High-gloss, transparent resins with UV stability and minimal yellowing are ideal for art castings, coatings, and lamination. These resins offer excellent clarity, moisture protection, and flow properties.
- Water-clear polyurethane resins are designed for prototyping high-clarity items like light lenses. These professional-grade resins provide unrivaled transparency and performance.
- Bubble-resistant resins are formulated to minimize air entrapment during the casting process. These resins are well-suited for crystal-clear, bubble-free castings without pressure pots or vacuum degassing.
When selecting a clear casting resin, consider factors such as the size of your project, desired clarity, curing time, and specific application requirements to ensure the best results.
Selecting the Ideal Epoxy
When selecting the suitable epoxy resin for your project, consider these key factors:
- Project size: Small projects like jewellery or repairs can use fast-setting epoxies. In contrast, more significant projects like river tables require deep pour resins with longer cure times.
- Desired finish: For a smooth, clear finish, choose a deep pour epoxy. Fast-setting resins are better for textured or less critical finishes.
- Application: Transparent, UV-resistant resins like Clear Cast 50 benefit artistic projects like jewellery and decor.
- Environment: Consider the temperature, humidity, and exposure (indoor/outdoor, submerged) of your project’s final location.
- Cure time: Fast-curing epoxies set quickly but allow less working time, while slower curing resins provide more time to manipulate the project before hardening.
- Adhesion: Use wood-specific epoxies for bonding wood or multi-purpose formulas for joining different materials.
By understanding your project requirements and matching them to the appropriate epoxy characteristics, you can get professional results and verify the longevity of your work.
Epoxy Casting Project Preparation
Here are some critical steps for using Clear Cast 50 in your epoxy casting projects:
- Carefully build and seal your mould. Common mould materials include silicone, smooth plastics like polyethene, metal, and melamine-coated MDF. To prevent leaks, completely seal the area you plan to fill using wax, caulk, hot glue, or plastic-backed tape.
- Use mould release agents like paste wax, spray wax, or PVA to ensure the cured epoxy releases easily from the mould surface. When embedding porous materials, seal them with epoxy or shellac first to prevent air bubbles.
- Calculate the amount of epoxy needed for your mould using a volume calculator or the approximate millilitre capacity listed in the mould’s product description. Mix the resin and hardener, following the manufacturer’s ratio and mixing time instructions.
- To minimize bubbles, pour the mixed epoxy slowly into the mould. Allow it to sit for several minutes so bubbles can rise to the surface, then pop them with a heat gun.
- You may need to cast the epoxy in multiple layers for large pours to prevent overheating. Pour subsequent layers when the previous pour has cured to a tacky stage, monitoring the epoxy temperature to avoid an uncontrolled exothermic reaction.
Properly preparing your mould, materials, and workspace will ensure you achieve professional-quality epoxy casting results.
Mixing and Pouring Epoxy
For the best results with Clear Cast 50, follow these mixing and pouring tips:
- Carefully measure the resin and hardener components according to the manufacturer’s recommended ratio, either by volume or weight. Inaccurate ratios can lead to improper curing or soft spots in the finished piece.
- Pour the hardener into the mixing container first, followed by the resin. This helps the two components mix more efficiently and reduces epoxy buildup on the container sides.
- Mix the resin and hardener thoroughly for 3-4 minutes, scraping the sides and bottom of the container to ensure complete blending.
- After mixing, pour the blended epoxy into a second clean container and mix for 1-2 minutes. This “double potting” technique helps ensure thorough mixing and reduces the chance of unmixed resin or hardener in the final pour.
- When pouring the epoxy, start at one end of the mould and pour in a thin, steady stream. This allows the epoxy to self-level and minimizes air entrapment.
- For large projects, pour the resin in multiple stages, allowing each layer to partially cure before adding the next.
- After pouring, use a heat gun to pass over the surface and pop any remaining bubbles quickly. Avoid holding the heat source in one spot for too long, as this can cause the epoxy to overheat or discolour.
By following these mixing and pouring techniques, you can achieve a well-blended, bubble-free epoxy casting with excellent clarity and durability.
Large Deep Pour Techniques
When working with large or deep pours, it is vital to follow guidelines to ensure optimal results. Deep-pour epoxy resins are designed to be poured in thick layers, typically up to 2 inches per layer, and require careful management of temperature and curing conditions to prevent issues like overheating, yellowing, or cracking. Maintaining a consistent working temperature between 60-75°F is essential, as higher temperatures can cause the resin to set too quickly and exotherm, leading to potential defects.
For larger projects, pouring the epoxy in multiple layers is often necessary, allowing each layer to partially cure before adding the next to avoid excessive heat buildup. Additionally, using a fan or air conditioning to calm the workspace can help manage the exothermic reaction. Proper mixing techniques are also vital, such as accurately measuring the resin and hardener and mixing slowly to minimize air bubbles. These practices can achieve precise, durable, and aesthetically pleasing results in deep-pour epoxy projects.
Epoxy Safety Best Practices
Here are some essential safety considerations and best practices when working with epoxy resin:
- Confirm whether proper ventilation is available in your workspace to reduce fume exposure. If possible, open windows, use fans or work outdoors.
- Wear appropriate personal protective equipment (PPE), including nitrile gloves and safety glasses, to avoid skin contact and prevent resin exposure.
- To prevent accidental ingestion, avoid eating, drinking, or smoking while working with epoxy resin. Wash hands thoroughly with soap and water after use.
- Keep epoxy resin out of reach of children. Store components in a secure location and dispose of containers properly.
- Read and follow the manufacturer’s instructions carefully. Pay attention to recommended mixing ratios, pot life, and cure times.
- Clean up spills and dispose of contaminated materials in a sealed container. Do not pour excess resin down the drain.
- When sanding or polishing cured epoxy, wear a dust mask to avoid inhaling particles. Work in a well-ventilated area and use a vacuum or wet-sanding method to minimize dust.
By prioritizing safety and adhering to these best practices, you can enjoy working with epoxy resin while minimizing health risks and ensuring a safe and successful project outcome.
Creative Resins: Clear Cast 50 with 25% discount
We at Creative Resins offer superior quality clear epoxy casting resin – Clear cast 50 at the best prices. When it comes to achieving stunning, crystal-clear epoxy casting results, our Clear Cast 50 is an excellent choice. It is extremely transparent and non-yellowing and can be cast up to 50mm thick in one application. It can also be machine-polished for a glass-like finish. This high-quality resin offers superior clarity, UV resistance, and ease of use, making it perfect for various applications. With fast shipping, helpful customer support, and unparalleled quality, you’ll create stunning epoxy masterpieces in no time. Don’t miss out on this opportunity to take your crafting to the next level with our Clear Cast 50. Call us now!
Where to Get Glow in the Dark Paint & Expert Tips for Using It
Are you ready to add a touch of magic to your art, decorations, or even your home? Glow-in-the-dark paint is a unique and fascinating medium that can bring your creations to life in the dark. But where can you find the best glow-in-the-dark paint, and how do you use it effectively?
et us explore the answers to these questions and provide valuable tips for using glow-in-the-dark paint.
Where to get Glow in the Dark Paint?
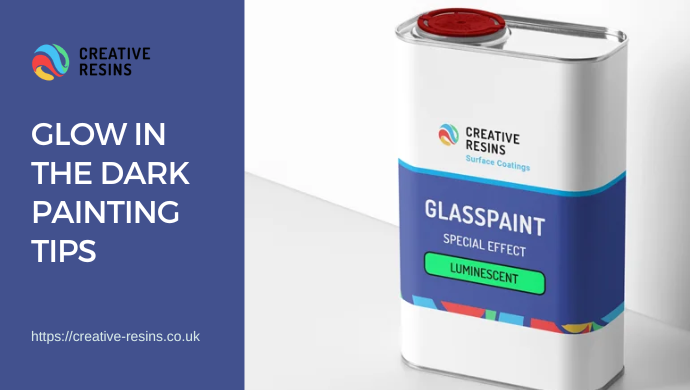
You can get premium quality Glow in the Dark Paint for glass from Creative Resins at the best prices. It is UV stable and has a Photoluminescent effect with glow-in-the-dark and heat-resistant properties. It is easy to apply using a conventional spray gun.
Glow in the Dark Painting Tips
Glow in the Dark paint is an excellent paint that can add a layer of creativity and excitement to your artwork. However, working with glow in the dark paint requires some special considerations and techniques to achieve the desired results. Here are some tips to help you get started:
Charge the Paint
Before you start painting, make sure the glow in the dark pigments are mixed well into the paint base. The best base to use is a transparent lacquer such as Creative Resins GlassPaint as it allows the natural light to energize the pigments. This process helps the paint absorb light and glow in the dark. You can change the paint by shining a UV light on it. You can use a UV flashlight, a black light bulb, or even the sun. The amount of time it takes to charge the paint depends on the paint type and the light’s intensity. Typically, it takes around 30 minutes to an hour to charge the paint thoroughly.
Choose the Right Surface
The surface you paint on can affect the glow-in-the-dark paint. Best results are achieved by painting over a white background as the white helps reflect the light source increasing the charge rate. However glow-in-the dark pigments can be used on a multitude of substrates including glass.
Apply Multiple Coats
To achieve the desired level of glow, you must apply multiple coats of paint. Permit each coat to dry before adding the next. Depending on the type of paint and surface, this can take several hours or even days.
Use a White or Light-Coloured Background
The glow in the dark paint is more visible when painted on a white or light-coloured background. This helps maximize the glow’s visibility and creates a striking contrast.
Avoid Mixing with Regular Paint
Glow in the dark paint should be applied using a transparent paint base coat. Mixing glow in the dark pigments into regular paint base that has thickening agents and extenders will dull the effect considerably.
Experiment with Techniques
Glow-in-the-dark paint can create a variety of effects. Try using different techniques like splattering, dabbing, or layering to create unique and exciting designs or even blending the colours.
Consider the Type of Paint
Different types of glow-in-the-dark paint are available, including fluorescent and neutral glow paints. Fluorescent paints show up more brightly, while neutral paints are more transparent and can create exciting effects in the dark.
Practice and Be Patient
As with any new technique, it may take some practice to master working with glow-in-the-dark paint. Be patient and experiment with different methods to achieve the desired results.
Conclusion
Glow in the dark painting is a fun and creative way to excite your artwork. By following these tips and experimenting with different techniques, you can create unique, striking designs that glow in the dark. Remember to charge the paint, use a suitable medium, and choose the right surface to achieve the best results. With proper practice and patience, you can master the art of glow-in-the-dark painting and create stunning pieces that will captivate your audience.
We at Creative Resins offer premium quality glow in the dark glass paint at the best prices. Our paint offers a photoluminescent effect on your substrate surface. It is an industrial-quality Photo-luminous system that provides high visibility glow-in-the-dark qualities and can be used as an effective safety aid for marking and highlighting. Call us now! – 01795 411820
How to use red oxide metal primer?
Are you looking to revamp your metal furniture or give your outdoor ironwork a fresh coat of paint? Look no further than red oxide metal primer, a versatile and durable solution for preparing metal surfaces before painting. This product is critical to achieving a smooth and long-lasting finish. Let us explore red oxide metal primer’s endless possibilities for transforming ordinary metal objects into stunning art pieces. Get ready to learn the tips and tricks for mastering red oxide metal primer like a pro!
How do Primers help to deal with rust?
Primers are crucial in dealing with rust by providing a protective barrier that blocks moisture and oxygen from entering the metal surface. By creating a sealed layer over the substrate, primers effectively block the formation of rust and corrosion, extending the lifespan of your metal objects. Primers act as an adhesive layer that helps paint adhere better to the surface, resulting in a more durable and long-lasting finish. Specific primers contain special additives that actively convert any existing rust into a stable compound, halting its progression. This unique feature stops rust in its tracks and strengthens the affected area, making it less susceptible to future corrosion. In essence, using primers is like giving your metal objects armour against the relentless forces of nature, ensuring they remain pristine and protected for years to come.
What is Red Oxide Metal Primer and how it helps combat rust?
Red metal oxide primer is a specialized type of paint that contains iron oxide, which provides excellent rust-inhibiting properties. It acts as a barrier between the metal surface and moisture in the environment, preventing oxidation and rust formation. This primer is commonly used on metal surfaces such as steel, iron, and aluminium to prolong their lifespan and maintain their appearance. One key factor that sets red metal oxide primer apart is its high resistance to corrosion caused by harsh environmental conditions. By creating a safety layer over the metal surface, this primer effectively blocks oxygen and water, two elements essential for rust formation. Its deep red colour also visualizes where it has been applied, making it easy to see any missed spots vulnerable to rusting. Red metal oxide primer is crucial in combatting rust by providing durable protection against corrosion for various metal surfaces. Its ability to form a strong bond with the substrate ensures long-lasting results and helps maintain the structural integrity of objects exposed to weathering or other corrosive elements. Considered an essential step in the painting process for metallic structures, this specialized primer proves its worth by significantly extending the lifespan of metals susceptible to rust damage.
Procedure to use red oxide metal primer
Once ready to use red oxide metal primer, ensure the surface is clean and free from rust or debris. This step is crucial for the primer to adhere effectively to the metal surface. Use a wire brush or sandpaper to remove rust or peeling paint before applying the primer. After preparing the surface, it’s time to apply the red oxide metal primer evenly using a brush or spray gun. Follow the manufacturer’s instructions regarding drying times and application techniques. Multiple thin coats will work better than one thick coat, resulting in a more durable and long-lasting finish on metal surfaces. Before moving on to additional coatings or finishing touches, allow sufficient time for the red oxide metal primer to dry completely. This step is essential for achieving optimal adhesion and durability of your paint job on metal surfaces. By following these steps diligently, you can ensure a professional-looking finish that protects your metal items from corrosion and wear over time.
Surface Preparation
Proper surface preparation is the cornerstone of any successful painting project, especially when working with metal surfaces. Before applying red oxide metal primer, ensure the surface is immaculately clean, arid, and free from dust, grease, or contaminants. Neglecting this crucial step can compromise the primer’s adhesion and durability, producing a subpar finish. One common enemy of metal surfaces is rust – a persistent foe that must be eradicated before applying any primer. Take the time to thoroughly remove any existing rust until you have a pristine metal surface ready for priming. Even minor patches of rust can wreak havoc on your paint job if not appropriately addressed. By paying attention to these details during surface preparation, you set yourself up for a smoother painting process and longer-lasting results.
Application
Primer application can be done with a brush, roller, or spray. Add 5% of the paint reducer to the primer using a brush or roller. Approximately 5% of the paint reducer should also be added for spray application. When applying red oxide metal primer, your chosen method can significantly impact the outcome. Using a brush or roller provides a more controlled application process, allowing for precise coverage and ensuring even distribution of the primer on the surface. Adding a paint reducer to the primer before application can improve its flow and adhesion properties, resulting in a smoother finish. Opting for a spray application offers advantages such as speed and efficiency. This technique is beneficial when dealing with intricate or hard-to-reach areas where a brush or roller may not provide optimal results. Choose your application method wisely based on your project requirements to achieve professional-looking results with red oxide metal primer.
Drying Times
After applying the red oxide metal primer, ensure sufficient drying time for optimal results. The key here is patience – rushing the process can compromise the quality of your finish. The primer needs at least 6-8 hours to dry to a touchable state, and be careful not to confuse this with being fully cured. To achieve total hardness, waiting between 8-10 hours is recommended. If you’re planning on recoating or top-coating, it’s best to leave it overnight for the primer to completely dry before proceeding.
Understanding the nuances of drying times can significantly affect the longevity and appearance of your metal surface. Rushing through this step can cause bubbling or uneven coverage, necessitating rework and potentially compromising your project’s overall integrity. By diligently following the prescribed drying times, you set yourself up for success and ensure that your red oxide metal primer performs optimally in protecting and enhancing your metal surfaces.
Storage and Disposal
After completing your project with red oxide metal primer, it’s crucial to properly store and dispose of the product to ensure safety and environmental protection. Seal the container tightly after use to avoid any spillage or leakage. Storing the primer in an area above 35°C helps maintain its quality for future use, ensuring a smooth application every time. Following government regulations and guidelines is essential when disposing of red oxide metal primer. These regulations protect the environment from harmful chemicals and substances that may be present in the product. By adhering to these disposal guidelines, you can contribute to sustainable practices and minimize the impact on our surroundings. Always prioritize safety measures when handling hazardous materials, like primers, during storage and disposal. Ensuring proper storage conditions and responsible disposal methods extends your products’ life and safeguards our environment for future generations. It’s crucial to talk to an expert for advice on the type of metal surface you are working with, application techniques, and rust prevention methods. For more detailed information, you can refer to the Creative Resins website.
When it comes to metal surfaces and rust prevention, seeking advice from an expert is essential. With the wide range of metals available and various application techniques, consulting with someone knowledgeable can significantly impact your project’s success. Experts can provide valuable insights on the specific type of metal you are working with, recommend suitable primer options, and suggest effective rust prevention methods tailored to your needs.
Conclusion
In conclusion, red oxide metal primer is crucial in preparing metal surfaces for painting. You can ensure a smooth, long-lasting finish by following the proper techniques and application methods. Clean and prepare the surface before applying the primer to achieve the best results. Always follow the manufacturer’s instructions for optimal performance. Carefully prepare and pay attention to detail to achieve professional results when using red oxide metal primer on your projects. Try it on your next metal painting project for a durable and professional-looking finish.
We at Creative Resins provide red oxide metal primers suitable for indoor and outdoor applications at the best prices. It is a good antioxidant and possesses anticorrosive properties. It can be used for Metal railings, Gates, Painting structural steel, Outdoor equipment, Galvanized metal, etc. Call us now! – 01795 411820
Exploring the Differences: Water-Based vs. Solvent-Based Surface Coatings
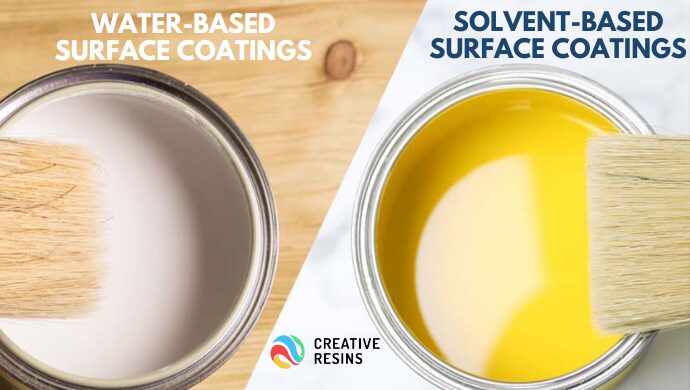
Water-based and solvent-based surface coatings are two main types of coatings utilized across various industries, each with its advantages and disadvantages. Understanding the distinctions between these coatings is vital for choosing the most appropriate option for specific applications. Let us explore the characteristics of both water-based and solvent-based coatings to help you make an informed decision.
Water-Based Surface Coatings
Water-based coatings employ water as their primary solvent. They are known for quick drying times and low odor, making them more convenient and safer in industrial and residential settings. They are effortless to clean, eliminating the need for harsh chemicals or solvents. This simplifies the painting process and reduces the environmental impact associated with cleaning up after painting projects. They possess excellent adhesion properties and can be applied to surfaces with minimal preparation, resulting in a more efficient and cost-effective coating solution. They offer several benefits:
Lower odor levels
Lower odor levels are a significant benefit of water-based coatings over solvent-based alternatives. The reduced presence of solid odors makes the application process more pleasant and minimizes disruptions. Lower odor levels have environmental benefits, as they contribute to reduced emissions of volatile organic compounds (VOCs). Water-based coatings are often seen as more sustainable due to their lower VOC content, making them a preferred choice for environmentally-conscious consumers and businesses aiming to reduce their carbon footprint.
Fewer health hazards during application
When comparing water-based and solvent-based coatings, an essential factor to consider is the health hazards during application. Water-based coatings contain lower amounts of VOCs, which are known to contribute to air pollution. Applying water-based coatings often results in a lower odor level, making it more comfortable for workers and occupants where the coating is being applied. These coatings also tend to dry faster.
Reduced flammability
Reduced flammability is critical when choosing coatings for workers in confined spaces. Water-based coatings have lower Volatile Organic Compound (VOC) content, making them less combustible and safer for use in enclosed environments. Workers in such areas can benefit significantly from the reduced flammability of water-based coatings, providing them with a safer working environment.
Emit fewer VOCs
Water-based coatings are becoming increasingly popular in the industrial sector due to their eco-friendly nature. One key advantage they offer is reducing volatile organic compound (VOC) emissions, which helps companies meet stringent environmental regulations and minimize their ecological footprint. The lower VOC content in water-based coatings benefits the environment and creates healthier workplaces for employees. By emitting fewer harmful chemicals during application, these coatings help improve indoor air quality. This can lead to a boost in employee morale and productivity while enhancing overall well-being within company premises.
Less susceptible to temperature and humidity fluctuations
Water-based coatings maintain their consistency and performance even in varying climate conditions. This makes them a preferred choice for areas with extreme temperatures or high humidity levels, where solvent-based alternatives might encounter difficulties. Water-based coatings’ resistance to temperature and humidity fluctuations leads to more predictable application outcomes. This level of reliability can be crucial for achieving a high-quality finish in challenging environments or when working on intricate projects that require precise coating application. Ultimately, the ability of water-based coatings to withstand these external factors showcases their versatility and adaptability, making them a practical and effective option for various painting and coating scenarios.
Solvent-Based Surface Coatings
Solvent-based coatings have long been favored in industrial and commercial applications for their numerous benefits. They are excellently resistant to chemicals and solvents and typically offer a smooth and glossy finish that enhances the aesthetic appeal of coated surfaces. When it comes to challenging environments or demanding performance requirements, solvent-based coatings are often the go-to choice due to their reliability and robust properties. Their versatility further expands their applicability across various projects and industries, making them a valuable asset in the coating industry landscape.
Better chemical resistance
Regarding better chemical resistance, solvent-based coatings tend to outperform water-based alternatives. This is because solvent-based coatings typically create a more rigid and durable protective layer that is less susceptible to damage from aggressive chemicals. The solvents in these coatings help them form a stronger bond with the surface, enhancing their ability to withstand harsh environments. The chemical structure of solvent-based coatings allows for greater formulation flexibility, enabling manufacturers to tailor the product to specific chemical resistance requirements. This customization can be particularly beneficial in industries where exposure to corrosive substances is daily, such as automotive manufacturing or industrial equipment production.
Durability
Durability is vital to consider when choosing between water-based and solvent-based coatings. While both options provide protective layers, the long-term resilience of the surface can vary significantly. Water-based coatings often excel in indoor environments, offering excellent durability against stains and scratches. However, solvent-based coatings tend to outperform their counterparts when it comes to high-traffic areas or outdoor applications exposed to harsh elements. The critical difference lies in how these coatings interact with surfaces over time. Solvent-based coatings form a strong bond with substrates, creating a durable barrier that can withstand heavy wear and tear. On the other hand, water-based coatings may require more frequent touch-ups or recoating in demanding environments to maintain durability. Understanding your project’s specific requirements is essential for achieving optimal longevity and performance results.
Faster drying times
This solvent-based coating aspect can significantly increase efficiency in various applications, reducing downtime and allowing for quicker turnaround times. The quicker drying also means multiple coats can be applied in less time, increasing productivity. Faster drying times can improve operational efficiency and create a more sustainable painting process.
Less susceptible to water damage
Surface preparation is vital in the coating application process and can significantly impact the durability and performance of the final finish. One key advantage of solvent-based coatings during surface preparation is their reduced susceptibility to water damage compared to water-based coatings. This resilience is particularly beneficial when working in damp or high-humidity conditions. The ability of solvent-based coatings to withstand moisture exposure during surface preparation can result in a smoother and more uniform finish, ultimately leading to better adhesion and longevity of the coating. This quality makes solvent-based coatings an ideal choice for projects where quick drying times are essential, reducing the risk of rework due to water-related issues. By selecting a coating less susceptible to water damage during surface preparation, contractors and DIY enthusiasts can achieve professional results with ease and confidence.
Can perform better in extreme temperatures
Water and solvent-based coatings have unique properties determining their performance in extreme temperatures. Water-based coatings tend to excel in hot climates as they are less likely to dry out quickly or become brittle than solvent-based options. The flexibility of water-based coatings allows them to maintain their integrity even when subjected to high temperatures. Solvent-based coatings have shown better resistance in freezing conditions due to their ability to withstand low temperatures without losing their structural strength. This makes them ideal for cold-weather applications where durability is essential. Understanding how each type of coating performs under extreme temperature variations is crucial for selecting the most suitable option based on the specific environmental conditions and requirements of the project at hand.
In conclusion, the choice between water-based and solvent-based coatings depends on various factors, including application requirements, environmental considerations, and safety concerns. While water-based coatings offer advantages such as lower VOC emissions and improved safety, solvent-based coatings excel in durability and performance in extreme conditions. Consulting with professionals knowledgeable about both types of coatings is crucial to ensure the selection of the most suitable option for each specific project. By weighing the advantages and disadvantages of water-based and solvent-based coatings, companies can achieve optimal results while adhering to environmental regulations and maintaining a safe work environment.
We at Creative Resins offer superior-quality water-based and solvent-based coatings at the best prices. We provide Surface Coatings for Composite Doors, PVCu Windows, Plastics, Metals, Woods, and Floor Paints. Our high-performance industrial-quality coatings allow for an endless colour choice and long-term warranties and guarantees for a variety of substrates. Call us now! – 01795 411820.
Can we use Acrylic Paint on Glass?
Glass painting is an art form that has captured the imaginations of artists for centuries, with its delicate beauty and unique challenges. While traditional methods like stained glass and glass blowing are well-known, have you ever considered using acrylic paint on glass? Imagine the possibilities – vibrant colours shimmering through the transparent surface, creating a mesmerising effect that blurs the line between painting and sculpture. Let us explore the intriguing question: Can acrylic paint be used on glass? Join us as we delve into this innovative technique and uncover the secrets of combining two seemingly contrasting mediums to create stunning works of art that will leave you in awe.
Specially formulated transparent Acrylic Glass Paints offer several advantages:
Permanent Adhesion
These paints are designed to adhere permanently to glass surfaces, ensuring long-lasting results without peeling or flaking.
Weathering Properties
They resist weather conditions such as rain, sunlight, and temperature fluctuations, making them suitable for exterior applications. This durability ensures the painted glass maintains its appearance over time, even in harsh outdoor environments.
Versatile Application methods
The ability to apply these paints using a variety of methods, including brush, pipette, aerosol can, or spray gun, provides flexibility for different projects and preferences. Whether it’s fine detailing with a brush or quick, even coverage with a spray gun, these paints offer options for every application need.
Water clear transparency
The transparent nature of the paint allows for the retention of the glass’s natural clarity while adding colour or design. This transparency is especially beneficial for projects where visibility through the glass is desired, such as windows or glass doors.
10-Year External Warranty
The inclusion of a 10-year external warranty speaks to the manufacturer’s confidence in the durability and longevity of their product. This warranty provides users with peace of mind, knowing that their investment is protected against premature deterioration or fading.
Overall, these specially formulated acrylic glass paints combine permanent adhesion, weather resistance, versatile application methods, transparency, and a long-term warranty to offer a high-quality solution for exterior glass projects.
Glass preparation
Cleaning the glass surface thoroughly before applying glass paints is crucial for achieving good adhesion and a professional finish. Using a specially formulated deep cleaning solution like those supplied by Creative Resins Ltd can ensure that any contaminants or residues are removed, allowing the adhesion additive in the glass paint to bond effectively to the glass surface. This promotes durability and long-lasting results.
GlassPaints offers a wide range of colour options through Creative Resins’ colour match software, ensuring precise formulations to match various colour charts like RAL, Pantone, and BS. Additionally, GlassPaints are available in both translucent and opaque formats and come in solvent-based and water-based versions to suit different preferences and applications.
We at Creative Resins offer premium-quality pre-mixed Acrylic Epoxy Resin Paint for Glass at the best prices. It is suitable for glass splashbacks, glass cladding, toughened glass, glass table tops, and bathroom glass panels. It can also be used behind hobs and ovens in kitchen areas. It is waterproof, UV stable, and weatherproof. It is fast-drying and can be effortlessly applied using a spray gun. Call us now! – 01795 411820
From Stained Glass to Mirror Effects: Unlocking the Potential of Different Glass Paints
Using glass paint, you can unleash your creativity and transform ordinary glass into extraordinary art. Let us take you on a journey from the mesmerizing beauty of stained glass paints to the captivating allure of mirror-effect glass paints. Discover the vast potential of different glass paints and learn how to combine them for stunning results. With our expert tips, you can achieve professional-looking glass paint applications that will leave you in awe.
Introduction
Different glass paints’ fascinating possibilities range from creating vibrant stained glass designs to achieving stunning mirror effects. Understanding techniques is vital to unlocking the full potential of glass paints. You can create unique and captivating artwork by exploring effects such as transparency, opacity, and texture. Glass paints can be used in various creative applications, including windows, glassware, and jewelry. However, there are essential considerations to remember when working with glass paints, such as the compatibility of paints with different types of glass and the need for proper ventilation during the painting process. Additionally, combining different types and colours of glass paints can produce even more dynamic and visually striking effects.
Understanding Stained glass paints
To understand stained glass paints, it’s essential first to define their characteristics. Stained glass paints are specially formulated to create vibrant and translucent colours on glass surfaces. They’re typically water-based and contain pigments compatible with glass, allowing for easy application and adhesion. Techniques for using stained glass paints include brush painting, airbrushing, and sponging, each offering different effects and textures. Projects using stained glass paints range from traditional stained glass windows to decorative items like vases and lampshades. It’s crucial to consider factors such as opacity, drying time, and layering techniques to achieve desired effects.
Definition and characteristics of stained glass paints
Stained glass paints are specially formulated paints designed to be applied on glass surfaces. Their unique properties allow them to adhere to glass and create vibrant and translucent colours. Here are three critical characteristics of stained glass paints:
1. Transparency: Stained glass paints are known for their transparency, which allows light to pass through the painted glass, creating a beautiful effect. This characteristic is crucial for achieving the signature stained glass look in projects.
2. Versatility: Stained glass paints can be used on various glass surfaces, including windows, vases, and lampshades. They can also be applied using brushwork, spraying, or airbrushing techniques, allowing for various creative possibilities.
3. Durability: Stained glass paints are designed to withstand the test of time. Once properly cured, they become permanent and resistant to fading, peeling, and cracking. It makes them ideal for long-lasting projects and ensures the colours remain vibrant and intact for years.
Techniques for using stained glass paints
Using various techniques, you can unlock the full potential of stained glass paints and create stunning effects on glass surfaces. Stained glass techniques offer many possibilities for achieving desired effects and adding depth to your artwork. One popular method is the mirror effect, where you apply metallic paint to the backside of the glass, creating a reflective surface. This technique is commonly used for creating decorative mirrors or adding a touch of elegance to your stained glass pieces. Another creative application is layering and blending techniques, where you apply multiple paint layers to create dimension and texture. It allows you to play with different colours and create unique effects. Experimenting with these techniques will help you unleash your creativity and elevate your stained glass artwork to new heights.
Examples of projects using stained glass paints
You can create various stunning projects using stained glass paints. Here are three project ideas that showcase the versatility of stained glass paints:
1. Faux Stained Glass Window: Transform an ordinary window into a work of art by painting a faux stained glass design. Outlining, shading, and blending techniques create intricate patterns and vibrant colours. Experiment with different colour combinations to achieve the desired effect.
2. Glass Vases: Give plain glass vases a unique and colourful makeover using stained glass paints. Apply the paints in layers, allowing each layer to dry before adding the next. Create a marbled effect by combining different colours or use a stencil to paint intricate designs. The translucent nature of stained-glass paints will give your vases a beautiful stained-glass appearance.
3. Glass Jewelry: Create stunning jewelry by painting on glass pendants or beads. Experiment with different surface options, such as clear or frosted glass, to achieve different effects. Use techniques like dotting, sponging, or brush strokes to create exciting patterns and textures. Combine different colours to create eye-catching designs.
These project ideas are just the beginning. Let your creativity run wild and find inspiration in the endless possibilities of stained glass paints.
Tips and tricks for achieving desired effects with stained glass paints
Achieve your desired effects with stained glass paints by experimenting with different techniques and colour combinations. When working with stained glass paints, several tips and tricks can help you unlock the full potential of these paints.
- Understanding the properties of the paint is crucial. Different paints have different consistencies and drying times, so read the instructions carefully.
- Practice different brush strokes and techniques to create various effects, such as shading, blending, and texture.
- Mixing different colours can create unique shades and tones, allowing you to achieve the desired look.
- Don’t be afraid to experiment and think outside the box. Stained glass paints offer endless possibilities for creativity, so let your imagination run wild.
Exploring Mirror Effect Glass Paint
Mirror effect glass paint is a particular type that creates a reflective surface on glass, giving it the appearance of a mirror. Different methods exist for creating mirror effects on glass, including spray-on coatings and adhesive-backed films. The creative applications of mirror effects on glass are vast, ranging from decorative accents in homes and businesses to artistic installations. When using mirror-effect glass paints, it’s essential to consider factors such as surface preparation, drying time, and proper ventilation to achieve optimal results.
Definition and characteristics of Mirror effect glass paint
Unlock the mesmerizing allure of mirror-effect glass paint by understanding its defining features and unique properties. Here are three critical characteristics of mirror-effect glass paint:
1. Reflective Surface: Mirror effect glass paint creates a highly reflective surface that mimics the appearance of a traditional mirror. When applied correctly, it gives glass surfaces a sleek and glossy finish, adding depth and sophistication to any space.
2. Versatile Application: Mirror effect glass paint can be applied to various glass surfaces, including windows, mirrors, and furniture. Its versatility allows for creative expression in contemporary art and interior design, making it popular among artists and designers.
3. Achieving Subtle Effects: While mirror effect glass paint can create a bold and striking mirror-like finish, it can also achieve a more subtle effect. Adjusting the application technique makes creating a softer and more delicate reflective surface possible, adding a touch of elegance to any glass object or space.
Different methods for creating mirror effects on glass
You can experiment with various techniques using mirror-effect glass paint to explore the different methods for creating mirror effects on glass. Mirror effect glass paint is specially formulated to give a reflective finish, similar to a traditional mirror. You can try several mirror effect techniques to achieve the desired effects on your glass surfaces.
One method is the spray technique, where you can use a spray gun or aerosol to apply the mirror effect paint onto the glass evenly. This technique allows for a smooth and seamless finish, giving your glass a stunning mirrored appearance.
Another method is the brush technique, where you can use a brush to apply the mirror effect paint onto the glass. This technique gives you more control over the application process, allowing you to create unique patterns and designs on your glass surfaces.
When using mirror-effect glass paint, there are some important considerations to remember.
- Properly clean and prepare the glass surface before applying the paint. It will ensure better adhesion and longevity of the mirror effect.
- Applying multiple thin coats of paint rather than one thick coat is recommended to achieve a more realistic mirror finish.
Mirror effect glass paint can be used for various creative applications, such as creating decorative mirrors, glassware, or artwork. With the proper technique and attention to detail, you can achieve stunning results that will enhance the beauty of your glass surfaces.
Creative applications of mirror effects on glass
Once you have mastered the techniques for creating mirror effects on glass using mirror-effect glass paint, there are countless creative applications that you can explore. Here are three innovative mirror effect techniques that can be used for your glass projects:
1. Layering: You can achieve a layered effect by applying multiple coats of mirror-effect glass paint. Experiment with different colours and opacity levels to create stunning visual effects.
2. Texturing: Use unconventional materials like sponges or stencils to create textured patterns on your glass surface. When combined with mirror-effect glass paint, these textures can create beautiful, shimmering patterns that catch the light in interesting ways.
3. Mixed Media: Combine mirror effect glass paint with other materials, such as beads, sequins, or metallic accents, to create experimental mirror effect projects. These unconventional mirror effect applications can add a touch of glamour and uniqueness to your glass artwork.
You can achieve stunning and unconventional results by exploring these creative options and pushing the boundaries of traditional mirror effect techniques.
Important considerations when using mirror-effect glass paints
Selecting high-quality paints is crucial to achieving mirror effects. Brands such as Creative Resins offer excellent options. Before starting your project, prepare the glass surface by cleaning it thoroughly and ensuring it’s free from any oils or residues. Apply the mirror effect paint evenly using a soft brush or sponge, following the manufacturer’s instructions for drying and curing times. Common challenges with mirror-effect glass paints include streaking and uneven coverage. To troubleshoot these issues, use lighter brush strokes and apply multiple thin layers rather than one thick coat. Experiment with different techniques to create unique mirror effects, such as dabbing or swirling the paint. Remember to practice on a small test piece before attempting larger projects to refine your technique and ensure desired results.
Other Types of Glass Paints
Now, let’s explore other types of glass paints that offer unique features and uses. One such type is metal paint, which adds a metallic sheen to glass surfaces and is often used for creating a sleek and modern look. Another type is chrome paint, which provides a reflective, mirror-like finish and is ideal for achieving a futuristic aesthetic. These different types of glass paints open up a world of possibilities for various projects, from creating statement pieces to adding a touch of elegance to home decor.
Introduction to other types of glass paints (e.g., metal paint, chrome paint)
You can explore the exciting possibilities of metal paint and chrome paint. Here are three ways these paints can enhance your artwork:
1. Metal Paint Applications: Metal paint, made with metallic pigments, can create a stunning metallic finish on glass. Its reflective surface adds depth and texture to your design, making it perfect for creating intricate patterns or adding a touch of luxury to your artwork.
2. Unique Properties of Metal Paint: Metal paint offers excellent adhesion and durability, ensuring your artwork lasts for years. It’s also resistant to fading, making it ideal for outdoor projects. Additionally, metal paint can be combined with other glass paints to achieve various colours and effects.
3. Techniques for Using Chrome Paint: Chrome paint creates a mirror-like finish on glass, giving your artwork a sleek and modern look. To achieve the desired effects, apply thin layers of chrome paint using a soft brush or sponge. Experiment with brush strokes and methods like dry brushing or stippling to create exciting textures and patterns.
Unique features and uses of each type of glass paint
Each type of glass paint offers distinctive qualities, making it ideal for various applications. Metal paint, for example, contains metallic pigments that create a shimmering effect on glass surfaces, adding a touch of elegance to your designs. Chrome paint, on the other hand, provides a mirror-like finish, perfect for creating reflective surfaces.
Examples of projects using different types of glass paints
Continuing the exploration of different types of glass paints and their unique features and uses, let’s now dive into some inspiring examples of projects that showcase the creative potential of these paints.
1. Glass paint techniques for creating textured effects:
Imagine a beautifully textured stained glass window, achieved by layering different shades of glass paints and using techniques like sponging, stippling, or dragging. The result is a stunning interplay of colours and textures that add beauty to any glass surface.
2. Using glass paints to enhance home decor:
Transform ordinary glass vases, candle holders, or picture frames into unique art pieces by simply applying glass paints. Whether you opt for a vibrant design or a delicate and ethereal motif, glass paints can instantly improve the appearance of your home decor.
3. Glass painting ideas for personalized gifts:
Show your loved ones how much you care by creating personalized gifts using glass paints. Paint a monogram or a meaningful quote on a glass plate or a set of wine glasses for an exceptional and thoughtful present.
Incorporating glass paints in various creative endeavors, such as jewelry making or mixed media artwork, opens up a world of possibilities for unique and visually captivating designs. Whether you’re a seasoned artist or a beginner, experimenting with different types of glass paints can bring your artistic visions to life.
Combining Glass Paints for Stunning Results
Combining different types of glass paints can offer several advantages when achieving stunning results in glass painting. By layering and blending different paints, you can create unique and dynamic effects that add depth and dimension to your artwork. Techniques such as using transparent paints over opaque ones or mixing different colours can produce beautiful and unexpected results. Proper application techniques, curing, and sealing different glass paints can result in a more durable and long-lasting finish.
Techniques for layering and blending glass paints
By incorporating various techniques for layering and blending glass paints, you can achieve stunning results that enhance your artwork. Layering techniques involve applying multiple coats of paint in different colours. It can be done by starting with a base layer and then gradually adding layers of lighter or darker shades. Blending techniques, on the other hand, involve mixing different colours to create new shades and gradients. It can be achieved using a palette knife or a brush to blend the colours while wet. From subtle transitions to bold contrasts, you can create various effects by layering and blending glass paints. This technique also allows for colour mixing and achieving texture, adding complexity and visual interest to your artwork. By mastering these techniques, you can unlock the full potential of glass paints and create genuinely breathtaking pieces.
Inspirational examples of mixed media glass painting projects
Here are three examples that showcase the creativity and versatility of mixed media techniques in glass painting:
1. Creative fusion:
Imagine a glass panel adorned with a combination of transparent glass paints and metallic paints. The luminous transparency and the reflective shimmer create a captivating visual effect.
2. Artistic combinations:
Picture a stained glass window featuring a harmonious blend of traditional stained glass paints and modern acrylic paints. This unique combination allows for a broader range of colour possibilities and intricate detailing, resulting in a captivating masterpiece that seamlessly merges the old and the new.
3. Experimental approaches:
Visualize a glass vase embellished with textured glass paints and resin. This experimental technique combines the textured paint’s tactile qualities with the resin’s glossy finish, creating a captivating tactile and visual experience.
These examples demonstrate the unconventional possibilities and limitless potential that arise when different glass paints are combined in mixed-media glass painting projects.
Tips for Proper Glass Paint Application
- To ensure proper glass paint application, thoroughly clean and prepare the surface. Utilize a lint-free cloth and a glass cleaner to remove any dirt, dust, or oils that may interfere with the paint adhesion.
- Choose the right brushes and tools, such as fine-tip brushes for intricate details and foam brushes for larger areas.
- When applying the glass paint, use even, smooth strokes and avoid overworking the paint to prevent streaks or clumps.
Preparing the glass surface for painting
To ensure proper glass paint application, thoroughly clean the glass surface. It removes any dirt, grease, or residue affecting the paint’s adhesion. Use a gentle cleaning method, such as a mild detergent and warm water or a glass-specific cleaner. Avoid abrasive cleaners or tools that can scratch the glass. After cleaning, prime the glass surface to enhance paint adhesion. Apply a thin layer of glass primer using a foam brush or a soft cloth. Permit the primer to dry completely before proceeding with the painting process. Consider surface treatment techniques to improve paint adhesion and longevity. One standard method is to sand the glass surface with fine-grit sandpaper lightly. It creates a slightly rough texture that helps the paint adhere better. Alternatively, you can use a glass etching cream to create a frosted or textured surface, providing a better grip for the paint.
Choosing the right brushes and tools
Choosing the right brushes is crucial for achieving the desired effects on glass. Synthetic brushes with soft bristles are ideal for glass painting, providing smooth and even coverage. Avoid using natural bristle brushes as they leave visible brush marks on the glass. Different tools can also be used to enhance your glass painting techniques. Consider using a liner brush or a fine-tipped paint pen for intricate details. Sponges or foam brushes can be used for creating textured effects or for blending colours. Exploring different options and experimenting with various brushes and tools is vital to finding what works best for your specific glass painting project.
Proper techniques for applying glass paints
Once you have chosen the right brushes and tools, you must learn the proper techniques for applying glass paints to achieve stunning results. Here are three tips and tricks for successful glass paint application:
1. Prep the surface:
Before applying glass paints, ensure the surface is clean and free from dust or oils. Use a mild detergent and water to clean the glass, and then wipe it dry with a lint-free cloth. It will ensure better adhesion and prevent any unwanted streaks or smudges.
2. Use thin, even coats:
Apply the glass paint in thin layers using a brush or sponge. Start from one edge and work across the surface, ensuring even coverage. Do not apply too much paint simultaneously, leading to drips or pooling. Multiple thin coats will allow you to achieve the desired effects more effectively.
3. Allow proper drying time:
After applying each coat of paint, allow it to dry completely before adding another layer. Follow the manufacturer’s instructions for drying times, as they may vary depending on the type of glass paint used. Rushing the drying process can result in uneven finishes or smudging.
Curing and sealing glass paint for long-lasting results
Curing techniques are crucial in preserving glass paint and achieving durable and long-lasting finishes. One popular method is heat curing, which involves placing the painted glass in a kiln or oven at a specific temperature and time. This process helps the paint bond securely to the glass surface, enhancing its durability and resistance to fading or peeling. Another curing technique is air drying, where the painted glass is left to dry naturally. While this method is less time-consuming, it may not provide the same level of durability as heat curing. After curing, sealing the glass paint is essential to protect it from external elements, such as moisture and UV rays. Various sealing methods can be used, including applying a clear coat or a sealant specifically designed for glass paints. These sealants create a protective barrier that enhances the longevity of the painted glass and prevents colour fading or damage. When selecting a sealing method, consider factors such as the type of glass paint used, the desired level of glossiness, and the environmental conditions to which the painted glass will be exposed. By following proper curing techniques and sealing methods, you can ensure that your glass paint retains its vibrant colours and remains intact for years.
Final thoughts on the versatility and beauty of glass painting
After exploring the endless possibilities of color blending, texture experimentation, layering techniques, gradient creation, and different finishes, it becomes clear that glass painting offers a versatile and beautiful medium for artistic expression. The versatility of glass painting allows for creative applications in various contexts, such as home decor, fine art, and even commercial displays. The beauty of glass painting lies in its ability to transform plain glass surfaces into vibrant works of art, adding sophistication to any space. You can achieve stunning effects like stained glass patterns, intricate designs, and even mirror-like reflections with the proper techniques and tools. To enhance your glass painting skills, consider these tips and tricks: experiment with various types of glass paints, practice on small surfaces before attempting larger projects, and use a variety of brushes and tools to create different textures and effects. With these techniques, you can unlock the full potential of glass painting and create genuinely exceptional art pieces.
Conclusion
In conclusion, understanding the potential of different glass paints can lead to stunning results in your artistic endeavors. From the vibrant colours of stained glass paints to the reflective effects of mirror glass paints, there are various options to explore. You can create unique and captivating designs by combining different types of glass paints. Remember to follow proper application techniques for the best outcome. Let your creativity shine through the glass, making your artwork a masterpiece.We, Creative Resins, provide various glass paints at the best prices. Some of our glass paints are metal corrosion effect glass paint, Cracked Ice Effect Infill Glass Paint, Granite Effect Spray Paint Glass Paint, mirror effect spray glass paint, chrome paint, Glitter paint, Crackle paint, etc, at the best prices. Call us now! 01795 411820.
